公式ドキュメントにある内容を参考にMCPサーバを作成して、Claudeで使用してみます。
今回作成するのはWindows環境になります。
MCPサーバの内容
今回作成する内容は公式ドキュメントにある内容と同じく、天気API(National Weather Service)を使ったMCPサーバになります。
使用できるツールとして、下記の2つを用意します。
- get-alerts:指定された州の天気警報を取得
- get-forecast:指定された緯度・経度の天気予報を取得
MCPサーバの作成
まずはプロジェクトディレクトリを作成して、移動します。
cd プロジェクトディレクトリ
package.jsonを作成します。
npm init -y
使用するパッケージをインストールします。
npm install @modelcontextprotocol/sdk zod
npm install -D @types/node typescript
package.json内に下記を追記します。
{
  ~ 略 ~
  "type": "module",
  "bin": {
    "weather": "./build/index.js"
  },
  "scripts": {
    "build": "tsc && chmod 755 build/index.js"
  },
  "files": [
    "build"
  ],
  ~ 略 ~
}
tsconfig.jsonを作成して、下記内容にします。
{
  "compilerOptions": {
    "target": "ES2022",
    "module": "Node16",
    "moduleResolution": "Node16",
    "outDir": "./build",
    "rootDir": "./src",
    "strict": true,
    "esModuleInterop": true,
    "skipLibCheck": true,
    "forceConsistentCasingInFileNames": true
  },
  "include": ["src/**/*"],
  "exclude": ["node_modules"]
}
srcディレクトリを作成して、その中にindex.tsファイルを作成します。
内容は以下の通りで、公式サイトのコードにコメントで説明を適宜追加しています。
import { McpServer } from "@modelcontextprotocol/sdk/server/mcp.js";
import { StdioServerTransport } from "@modelcontextprotocol/sdk/server/stdio.js";
import { z } from "zod";

// 天気API(National Weather Service)のベースURL
const NWS_API_BASE = "https://api.weather.gov";
// APIにアクセスする際のUser-Agent(アクセス元情報)
const USER_AGENT = "weather-app/1.0";

// MCPサーバのインスタンスを作成
const server = new McpServer({
  name: "weather",
  version: "1.0.0",
  capabilities: {
    resources: {},
    tools: {},
  },
});

/**
 * NWS(天気API)にリクエストを送って、JSONレスポンスを取得する関数
 * @param url - アクセスするAPIのURL
 * @returns - JSONとしてパースされたデータ もしくは null
 */
async function makeNWSRequest<T>(url: string): Promise<T | null> {
  const headers = {
    "User-Agent": USER_AGENT,
    Accept: "application/geo+json",
  };

  try {
    // APIへリクエストを送信
    const response = await fetch(url, { headers });
    if (!response.ok) {
      throw new Error(`HTTP error! status: ${response.status}`);
    }
    // レスポンスをJSONとして返す
    return (await response.json()) as T;
  } catch (error) {
    // 通信エラーやパースエラーが発生した場合はnullを返す
    console.error("Error making NWS request:", error);
    return null;
  }
}

// アラート情報の型
interface AlertFeature {
  properties: {
    event?: string;
    areaDesc?: string;
    severity?: string;
    status?: string;
    headline?: string;
  };
}

/**
 * アラート情報を整形する関数
 */
function formatAlert(feature: AlertFeature): string {
  const props = feature.properties;
  return [
    `Event: ${props.event || "Unknown"}`,
    `Area: ${props.areaDesc || "Unknown"}`,
    `Severity: ${props.severity || "Unknown"}`,
    `Status: ${props.status || "Unknown"}`,
    `Headline: ${props.headline || "No headline"}`,
    "---",
  ].join("\n");
}

// 天気予報1期間分のデータの型
interface ForecastPeriod {
  name?: string;
  temperature?: number;
  temperatureUnit?: string;
  windSpeed?: string;
  windDirection?: string;
  shortForecast?: string;
}

// NWSアラートAPIのレスポンス型
interface AlertsResponse {
  features: AlertFeature[];
}

// 指定座標に対するポイントAPIのレスポンス型
interface PointsResponse {
  properties: {
    forecast?: string;
  };
}

// 予報APIのレスポンス型
interface ForecastResponse {
  properties: {
    periods: ForecastPeriod[];
  };
}

/**
 * MCPのツールに州のアラート情報を取得する機能を登録
 */
server.tool(
  "get-alerts",  // ツール名
  "Get weather alerts for a state", // ツールの説明
  {
    // 入力パラメータの定義(2文字の州コード)
    state: z.string().length(2).describe("Two-letter state code (e.g. CA, NY)"),
  },
  async ({ state }) => {
    const stateCode = state.toUpperCase();
    const alertsUrl = `${NWS_API_BASE}/alerts?area=${stateCode}`;
    const alertsData = await makeNWSRequest<AlertsResponse>(alertsUrl);

    if (!alertsData) {
      return {
        content: [
          {
            type: "text",
            text: "Failed to retrieve alerts data",
          },
        ],
      };
    }

    const features = alertsData.features || [];
    if (features.length === 0) {
      return {
        content: [
          {
            type: "text",
            text: `No active alerts for ${stateCode}`,
          },
        ],
      };
    }

    const formattedAlerts = features.map(formatAlert);
    const alertsText = `Active alerts for ${stateCode}:\n\n${formattedAlerts.join("\n")}`;

    return {
      content: [
        {
          type: "text",
          text: alertsText,
        },
      ],
    };
  },
);

/**
 * MCPのツールに任意の緯度・経度における天気予報を取得する機能を登録
 */
server.tool(
  "get-forecast",  // ツール名
  "Get weather forecast for a location", // ツールの説明
  {
    // 緯度と経度を入力パラメータとして受け取る
    latitude: z.number().min(-90).max(90).describe("Latitude of the location"),
    longitude: z.number().min(-180).max(180).describe("Longitude of the location"),
  },
  async ({ latitude, longitude }) => {
    const pointsUrl = `${NWS_API_BASE}/points/${latitude.toFixed(4)},${longitude.toFixed(4)}`;
    const pointsData = await makeNWSRequest<PointsResponse>(pointsUrl);

    if (!pointsData) {
      return {
        content: [
          {
            type: "text",
            text: `Failed to retrieve grid point data for coordinates: ${latitude}, ${longitude}. This location may not be supported by the NWS API (only US locations are supported).`,
          },
        ],
      };
    }

    const forecastUrl = pointsData.properties?.forecast;
    if (!forecastUrl) {
      return {
        content: [
          {
            type: "text",
            text: "Failed to get forecast URL from grid point data",
          },
        ],
      };
    }

    const forecastData = await makeNWSRequest<ForecastResponse>(forecastUrl);
    if (!forecastData) {
      return {
        content: [
          {
            type: "text",
            text: "Failed to retrieve forecast data",
          },
        ],
      };
    }

    const periods = forecastData.properties?.periods || [];
    if (periods.length === 0) {
      return {
        content: [
          {
            type: "text",
            text: "No forecast periods available",
          },
        ],
      };
    }

    // 各期間ごとの予報を整形
    const formattedForecast = periods.map((period: ForecastPeriod) =>
      [
        `${period.name || "Unknown"}:`,
        `Temperature: ${period.temperature || "Unknown"}°${period.temperatureUnit || "F"}`,
        `Wind: ${period.windSpeed || "Unknown"} ${period.windDirection || ""}`,
        `${period.shortForecast || "No forecast available"}`,
        "---",
      ].join("\n"),
    );

    const forecastText = `Forecast for ${latitude}, ${longitude}:\n\n${formattedForecast.join("\n")}`;

    return {
      content: [
        {
          type: "text",
          text: forecastText,
        },
      ],
    };
  },
);

/**
 * MCPサーバのメイン処理
 */
async function main() {
  const transport = new StdioServerTransport();
  await server.connect(transport);
  console.error("Weather MCP Server running on stdio");
}

// メイン処理の実行
main().catch((error) => {
  console.error("Fatal error in main():", error);
  process.exit(1);
});
これで作成が完了したので、最後にビルドを実行します。
npm run build
buildディレクトリ内にindex.jsファイルが生成されたらOKです。
Claudeの設定
上記で作成したMCPサーバを、Claudeのデスクトップアプリで使えるように設定します。
過去にMCPサーバを使ったことがある場合、claude_desktop_config.jsonを変更します。
使ったことがない場合はおそらくclaude_desktop_config.jsonのファイルがないので、過去に投稿したClaudeでMCPを使用する記事を参考にclaude_desktop_config.jsonのファイルを作成してください。
claude_desktop_config.jsonの内容を以下のようにします。
{
  "mcpServers": {
    "weather": {
      "command": "node",
      "args": [
        "\\プロジェクトディレクトリのパス\\build\\index.js"
      ]
    }
  }
}
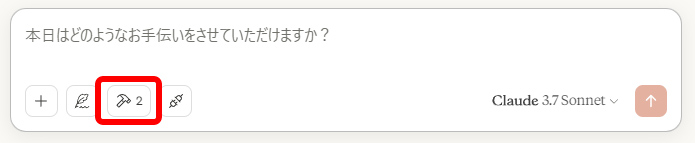
これでClaudeの再起動を行い、ハンマーのアイコンが表示されていればOKです。
ただClaudeでMCPを使用する記事の時と同様、今回も「spawn node ENOENT」というエラーが出て最初はうまく設定されませんでした。
対応方法としては前回と同じで、”command”: “node” のnodeをフルパスに変更することでアイコンが表示されました。
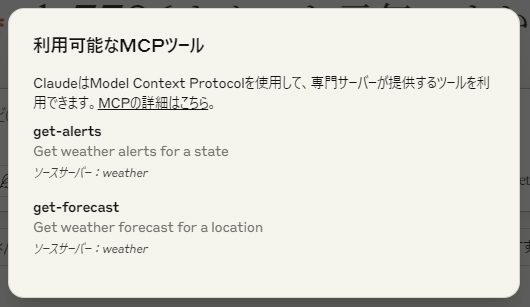
ハンマーのアイコンをクリックすると、最初に紹介した「get-alerts」と「get-forecast」というツールを使用できることが確認できます。
実際に動作を試してみます。
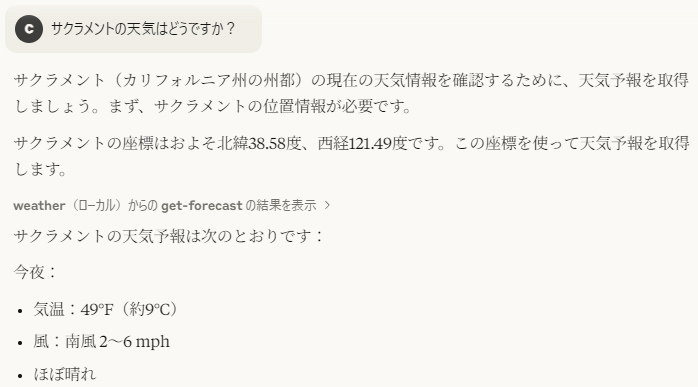
「サクラメントの天気はどうですか?」と質問してみます。
以下のように「get-forecast」のツールの利用許可の確認が表示されました。

許可を出すと、サクラメントの天気の回答を確認できました。
コメントが承認されるまで時間がかかります。