create-react-appを使って、Reactの環境を作成してみます。
インストール
create-react-appを使用する際、Nodeのバージョン14以上が必要になるようです。
ターミナルでプロジェクトフォルダを作成したいディレクトリに移動して、下記を実行します。
npx create-react-app プロジェクト名
yarnの場合は下記になります。
yarn create react-app my-app
インストール完了後にプロジェクトディレクトリに移動して、下記コマンドを実行すると開発環境が起動します。
npm start
ディレクトリ構成
プロジェクトのディレクトリ構成は以下のようになっています。
- node_modules/
- public/
- favicon.ico
- index.html
- logo192.png
- logo512.png
- manifest.json
- robots.txt
- src/
- App.css
- App.js
- App.test.js
- index.css
- index.js
- logo.svg
- reportWebVitals.js
- setupTests.js
- .gitignore
- package.json
- package-lock.json
- README.md
srcディレクトリが開発で主に使用するディレクトリで、JavaScriptのファイルとCSSのファイルはsrcディレクトリ内に配置しないとwebpackがファイルを認識しません。
ファイルの中身をいくつか確認してみます。
public/index.htmlがページテンプレートになります。
ファイル内容は下記の通りです。
<!DOCTYPE html>
<html lang="en">
  <head>
    <meta charset="utf-8" />
    <link rel="icon" href="%PUBLIC_URL%/favicon.ico" />
    <meta name="viewport" content="width=device-width, initial-scale=1" />
    <meta name="theme-color" content="#000000" />
    <meta
      name="description"
      content="Web site created using create-react-app"
    />
    <link rel="apple-touch-icon" href="%PUBLIC_URL%/logo192.png" />
    <!--
      manifest.json provides metadata used when your web app is installed on a
      user's mobile device or desktop. See https://developers.google.com/web/fundamentals/web-app-manifest/
    -->
    <link rel="manifest" href="%PUBLIC_URL%/manifest.json" />
    <!--
      Notice the use of %PUBLIC_URL% in the tags above.
      It will be replaced with the URL of the `public` folder during the build.
      Only files inside the `public` folder can be referenced from the HTML.

      Unlike "/favicon.ico" or "favicon.ico", "%PUBLIC_URL%/favicon.ico" will
      work correctly both with client-side routing and a non-root public URL.
      Learn how to configure a non-root public URL by running `npm run build`.
    -->
    <title>React App</title>
  </head>
  <body>
    <noscript>You need to enable JavaScript to run this app.</noscript>
    <div id="root"></div>
    <!--
      This HTML file is a template.
      If you open it directly in the browser, you will see an empty page.

      You can add webfonts, meta tags, or analytics to this file.
      The build step will place the bundled scripts into the <body> tag.

      To begin the development, run `npm start` or `yarn start`.
      To create a production bundle, use `npm run build` or `yarn build`.
    -->
  </body>
</html>
src/index.jsがJavaScriptのエントリーポイントになります。
import React from 'react';
import ReactDOM from 'react-dom/client';
import './index.css';
import App from './App';
import reportWebVitals from './reportWebVitals';

const root = ReactDOM.createRoot(document.getElementById('root'));
root.render(
  <React.StrictMode>
    <App />
  </React.StrictMode>
);

// If you want to start measuring performance in your app, pass a function
// to log results (for example: reportWebVitals(console.log))
// or send to an analytics endpoint. Learn more: https://bit.ly/CRA-vitals
reportWebVitals();
ファイル内上部でsrc/index.css、src/App.js、src/reportWebVitals.jsが読み込まれていますが、reportWebVitals.jsはWeb Vitalsの計測ライブラリの設定が入っているようです。
src/index.cssとsrc/App.jsを見てみます。
まずはsrc/index.cssです。
body {
  margin: 0;
  font-family: -apple-system, BlinkMacSystemFont, 'Segoe UI', 'Roboto', 'Oxygen',
    'Ubuntu', 'Cantarell', 'Fira Sans', 'Droid Sans', 'Helvetica Neue',
    sans-serif;
  -webkit-font-smoothing: antialiased;
  -moz-osx-font-smoothing: grayscale;
}

code {
  font-family: source-code-pro, Menlo, Monaco, Consolas, 'Courier New',
    monospace;
}
次にsrc/App.jsです。
import logo from './logo.svg';
import './App.css';

function App() {
  return (
    <div className="App">
      <header className="App-header">
        <img src={logo} className="App-logo" alt="logo" />
        <p>
          Edit <code>src/App.js</code> and save to reload.
        </p>
        <a
          className="App-link"
          href="https://reactjs.org"
          target="_blank"
          rel="noopener noreferrer"
        >
          Learn React
        </a>
      </header>
    </div>
  );
}

export default App;
src/App.jsで読み込まれているsrc/App.cssを見てみます。
.App {
  text-align: center;
}

.App-logo {
  height: 40vmin;
  pointer-events: none;
}

@media (prefers-reduced-motion: no-preference) {
  .App-logo {
    animation: App-logo-spin infinite 20s linear;
  }
}

.App-header {
  background-color: #282c34;
  min-height: 100vh;
  display: flex;
  flex-direction: column;
  align-items: center;
  justify-content: center;
  font-size: calc(10px + 2vmin);
  color: white;
}

.App-link {
  color: #61dafb;
}

@keyframes App-logo-spin {
  from {
    transform: rotate(0deg);
  }
  to {
    transform: rotate(360deg);
  }
}
ファイルの追加
コンポーネントの追加を試してみます。
srcディレクトリにButton.jsを追加して、以下の内容にします。
import { useState } from 'react';
import './Button.css';

function Button() {
  const [count, setCount] = useState(0);

  const clickEvent = () => {
    setCount(count + 1);
  }
  return (
    <button className='Button' onClick={clickEvent}>count: {count}</button>
  );
}

export default Button;
同じくsrcディレクトリにButton.cssを追加して、以下の内容にします。
.Button {
  -webkit-appearance: none;
  -moz-appearance: none;
  appearance: none;
  padding: 10px 20px;
  border: none;
  background: skyblue;
  cursor: pointer;
}
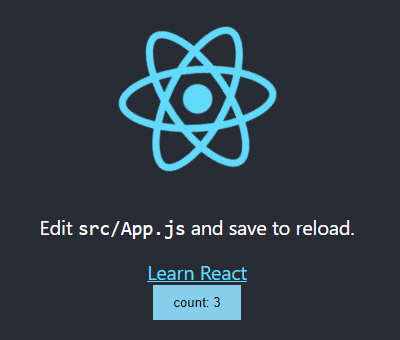
これでButtonのコンポーネントが作成できたので、先ほどのsrc/App.jsの中で読み込んでみます。
import logo from './logo.svg';
import './App.css';
import Button from './Button';

function App() {
  return (
    <div className="App">
      <header className="App-header">
        <img src={logo} className="App-logo" alt="logo" />
        <p>
          Edit <code>src/App.js</code> and save to reload.
        </p>
        <a
          className="App-link"
          href="https://reactjs.org"
          target="_blank"
          rel="noopener noreferrer"
        >
          Learn React
        </a>
        <Button />
      </header>
    </div>
  );
}

export default App;
これでカウントアップするボタンの追加ができました。
ビルド
本番環境にデプロイする際は下記コマンドを実行します。
npm run build
これでbuildフォルダにファイルが生成されました。
ビルド後のデモページ(パスを変更しています。)
コメントが承認されるまで時間がかかります。