GitHub Copilotを使用できる機会があったので、VSCodeで使用する際の流れと、実際に使ってみるところまでを試してみます。
設定方法
GitHub Copilotへの登録(アクセス権限の付与)の後の、VSCodeの設定から行います。
VSCode以外にも、JetBrains IDEs、Vim/Neovim、Visual Studioに対応しているようです。
拡張機能で「GitHub Copilot」を検索してインストールします。
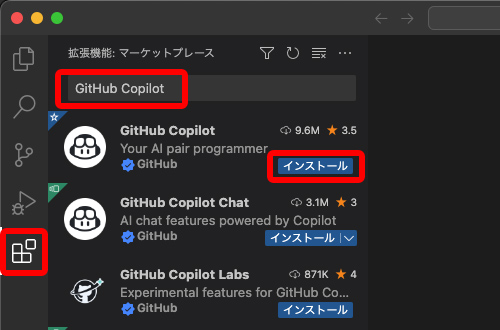
インストール後、右下のポップアップからGitHubに遷移します。
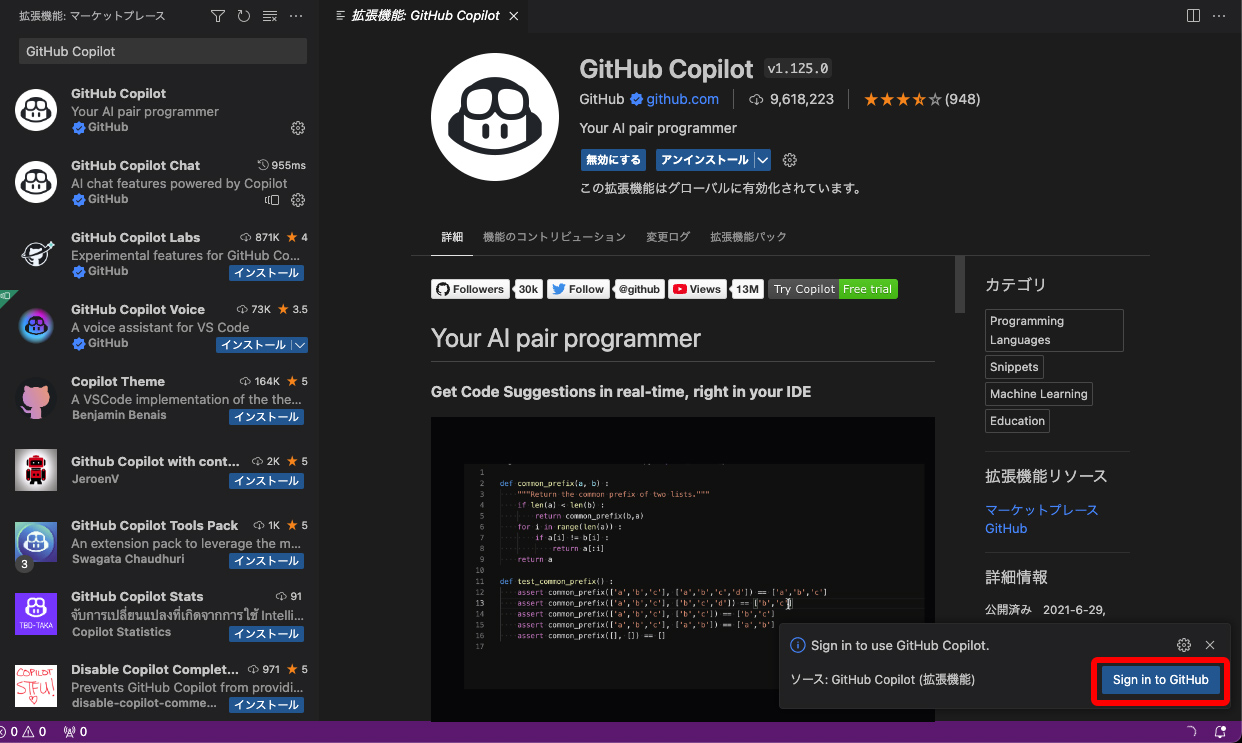
GitHubの連携を許可するかどうか聞かれるので、Authorize Visual-Studio-Codeを選択します。

これでGitHub Copilotを使用する準備ができました。
使い方
実際にGitHub Copilotを簡単に試してみます。
jsファイルを作成して、下記を入力します。
function calculateDaysBetweenDates(begin, end) {
すると入力候補が表示されます。
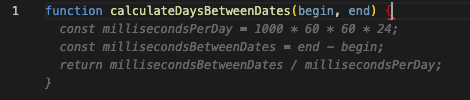
tabキーを押すとその入力候補が挿入されます。
function calculateDaysBetweenDates(begin, end) {
	const millisecondsPerDay = 1000 * 60 * 60 * 24;
	const millisecondsBetweenDates = end - begin;
	return millisecondsBetweenDates / millisecondsPerDay;
}
関数名ではなくコメントからコードの候補を生成することもできます。
以下のようなコメントを入力します。
// find all images without alternate text
// and give them a red border
function process() {
以下のような入力候補が表示されました。
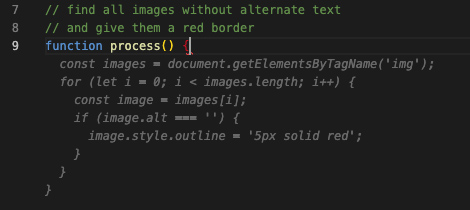
// find all images without alternate text
// and give them a red border
function process() {
	const images = document.getElementsByTagName('img');
	for (let i = 0; i < images.length; i++) {
		const image = images[i];
		if (image.alt === '') {
			image.style.outline = '5px solid red';
		}
	}
}
英語ではなく日本語のコメントでも可能です。
// altテキストのない画像を探して、赤い枠線を付ける
先ほどと同様の入力候補が表示されました。
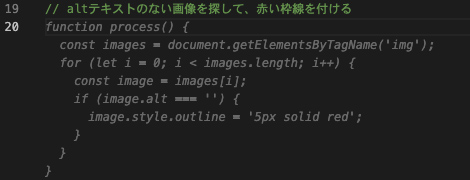
// altテキストのない画像を探して、赤い枠線を付ける
function process() {
	const images = document.getElementsByTagName('img');
	for (let i = 0; i < images.length; i++) {
		const image = images[i];
		if (image.alt === '') {
			image.style.outline = '5px solid red';
		}
	}
}
コメントが承認されるまで時間がかかります。